Tuesday, January 19, 2021

The Beast is skinned!

 ....and I have the scars to prove it!


I spent a few hours last night with my feet up, stitch ripper in hand, and the Monday night back to back episodes of Blue Bloods on TV.  I finally finished the mammoth task of removing the former quilting stitches.


My next step will be to remove the stray threads on the quilt top.  The batting and backing have been discarded.  I cut them off in chunks as I went in order to have less bulk.  And honestly, it also helped me see how far I had to go. I was thrilled to see a placemat size area last night with about another hour to go.  That spurred me on to finish last night.


One I get the stray threads removed, I will be adding some new borders to make the quilt wider.  It doesn't have quite enough 'drop' on the sides.  I won't lengthen it as we don't like the over the pillow tuck.  We like the quilt to the headboard under the pillows.

I made some interesting discoveries along the way:

1. I decided I don't like wool batting for quilts.  At least on this quilt, I found that once it was washed for the first time many moons ago, it crinkled way too much for my liking.  It seemed to almost shrink the quilt.  I do love that crinkled antique look but this was really crinkly...too much.  The indentation of the stitches is significant and I'm really hoping to flatten the quilt top with enough pressing to erase the previous stitches. Wish me luck!

2.  I was surprised by the fact that the quilt seemed slightly soiled.  I have washed it plenty and it hasn't been on the bed that much. (I rotate them seasonally)  So there was something about either the detergent I used or that it wasn't rinsed well and had soap residue on it or I put it away before washing it for storage.  Either way, I will be using the laundry stripping technique with borax and washing soda after it is quilted. It needs freshening.

3.  Sadly, I found a few spots where I created a hole by being overly aggressive with the stitch ripper.  There was no stitch regular used by the quilter and in some spots the stitch length is large and easily removed, but in other spots the stitches are really tight and hard to remove.  I will go over the whole quilt to see if block repairs are needed.


When I look at this quilt from a distance it makes my heart sing and I know I made the right decision to restore it.  I loved it when I made it, and I love it now.  I was just sad to see the stitches breaking all over the quilt and have no regrets on my decision to unpick it and redo the quilting. In my books, this is an heirloom quilt to be handed down.


I almost forgot to mention that this quilt pattern is called Carolina Christmas.  It was a Bonnie Hunter-Quiltville free winter mystery from 2009 and can now be found in her book, Scraps & Shirttaiils II.  I modified it slightly by adding sashing strips and I did a plain border.


I am hoping to get the next stage of the quilt restoration done soon so I can get this quilt onto my Millie and finish it off with a pantograph yet to be decided upon.  Check back soon!

Until next time,

Mavis


Wednesday, December 30, 2020

Sewing Room Makeover

When we bought our house in 2015, I immediately claimed this room for my sewing room.  You must be wondering why.  "It's the laundry room!", I can hear you say.  Yes, but it's so much more!  It's bright and it has closets galore!  It is a converted bedroom.  And that counter!!  Perfect cutting height. That closed door leads to a partial ensuite off the master bedroom which I don't need access to from this room.  So it's a good candidate for adding shelf space.


So...the closets... the only issue I have had is that one of the two closets was entirely dysfunctional for my purposes.


Both sides were the 'skirts & shirts' style of closet which is great for your wardrobe but so much wasted space for my application of fabric and bins of projects and tools.

I decided that during my scheduled time off after getting all my customer's Christmas gift quilts done and delivered, that I was going to:

1.  Reorganize my sewing room;

2.  Get a head start on year end bookkeeping; and

3.  Get some of my own quilts quilted.

I'm going to load one of my quilts at some point today and I've indeed started on the bookkeeping/paper clutter but most of my time has been spent ironing fabric and putting it on comic book boards in anticipation of getting these four cubes I ordered from Walmart online.


With the exception of the baseboard on the left, they fit exactly in my space.  Hubby found some 5" bricks in the yard which we cleaned off and used to prop up the shelf that was too snug because of the baseboard.  Voila!

My family put the four cubes together while I was ironing fabric and long story short, the makeover is now done!

I will spare you all the boring stuff about all the dust bunnies encountered along the way.  I will however show you some before and after pictures so you can get a glimpse of how happy I am now that it's all organized.  

At the beginning of the Covid issue just before the lockdown, I was the beneficary of some fabric when another quilter downsized her home and had to destash.  With this addition, my room was bursting at the seams and it was just a giant mess.  I was so grateful for the fabric but so overwhelmed. Worse yet was the fact that I really didn't know or appreciate what I had in my palette of colours.  While standing and ironing for hours and days is hard on the body, the results of getting reacquainted with some pieces I had forgotten about was great.

So without further ado... the BEFORE PICTURES...

One of my iterations of trying to store my fabric.  This was before the latest gift of fabric arrived. And design walls were in the hallway.

Yes, the floppy bolts.  I had the right idea but this space needed help. Also before the gifted fabric arrived.

My workspace on any given day.  I didn't say I was neat. ;) This does not bring me joy.

View from my sewing chair.  Love my cutting counter above the washer & dryer but I don't love the clutter on top of the counter but there's nowhere else to put stuff! 

Yes a quilter lives here.  And so do these adorable doggies who love to be with me on something soft. I'm planning on making a lovely jelly roll rug for their comfort and to add some colour to my room.  It will be purple and teal most likely.  Or maybe scrappy...she says as she's thinking of her 2 1/2" strip bin that is filled to the brim! 

Bins and bins and bins... Imagine trying to get something out from the one on the bottom.  And yes they crashed to the floor more than once. Ugh.


Also another early attempt to quilt storage until I realized that they would like fade being next to that window.

Long view from the hallway into the sewing room.

Are you ready for the reveal of my new and improved happy place? 

Small pieces sorted by colour in shoe box bins.  Closet door closes to keep light from fading them.  These include fat quarters and half yard cuts. Also now have room for laundry soap etc. in a bin instead of on the floor or on my cutting counter.

These tubs are filled with random cuts made with my Accuquilt GO cutter when I was cutting just to deal with the scraps with no plan in the works.  I don't do that anymore.  I now cut them when I have a project in mind.  These take up too much space without a plan so in my books that's not smart. (Exception is cutting strips...they are always useful!.  I mean shapes like tumblers, bricks, etc.)


This is the right side of my reformatted long closet.  This has two cubes stacked and anchored to the wall.  This side has my tools and notions/rulers plus my UFOs in tubs in the bottom.  Notice the lids are off.  This makes it easy to see them without digging.  Besides the lids didn't fit nicely in the 11" width but the bins did.


This left side brings me joy.  My whole yardage stash, all tidy.  The bottom row is bins of precuts.

I now have my quilts hung on the right on the closet pieces that were already there.  The doors close to keep the light from fading them.  That hanging organizer holds all my projects and kits that are ready to do when my UFOs are history.  I'm beginning to see the finish line and it feels so good.

Hello counter!  Nice to be reacquainted.  See where the idea of purple and teal happened for my rug?

This is something I need to deal with.  I'm keeping the lid off on purpose.  Those are my scraps that need cutting.  It's higher than a large pile of laundry.  I added a bunch to the pile as I was ironing my gifted stash.  The previous quilter was an art quilter and there were pieces with bite missing, so I just trimmed past the chunks missing and added those pieces to the scrap pile and folded the rest for my shelves.

I also used Velcro with adhesive back to affix my design walls to my sliding mirrored doors.  The mirrors made the room look bigger but it also magnified the clutter x 2!!  And I'm happy to have my design walls right beside my sewing machine.

Well that was fun!  You can see that I've used all my available space in my makeover.  This cost me less than $300 to do with the help of my family to assemble my shelves.  I do love order even though I'm not the tidiest of people (especially mid project).

I'm going to stare at it for a bit before I get my GO cutter out and cut some triangles for my Simply Triangles project for the new year.  You can read about that post here.  But there are some luscious colours in that scrap box that will add some warmth and brightness to my quilt and I'm really excited to get started on it...but not before those UFOs are done. ;)


Until next time, you'll find me in my happy place. Happy New Year!

Mavis


Monday, November 23, 2020

Restoration Underway!

This is my Bonnie Hunter’s mystery quilt from 2009 called Carolina Christmas. I love this quilt...alot!

I modified it by adding plain sashing strips. It was longarm quilted using wool batting so it's very cozy and has a lovely drape to it.


It also has some damage and it doesn’t quite fit my king sized bed so I wondered if I should part with it and list it in my Etsy shop with the others. A lot of the stitches that the longarm quilter used are coming undone randomly all over the quilt and now that I've got my own longarm I'd really like to change the quilting design. I will miss the wool batting used but it's not a deal breaker and it's replaceable.


I also noted that one of my dear doggies chewed a corner.

The bottom line is I can’t sell it for what it's worth and I'm not really sure I want to. As of an hour ago I made the crazy decision to restore it. I’m going to start by unpicking all her stitching then I will remove the binding and add another border and then requilt it. Call me crazy but I love this quilt too much to get rid of it.

This meme is so funny. My day started with cleaning my sewing room and now look what I'm doing! I found this treasure and have a new project now...a restoration project!

I have no deadline for this restoration so you may want to check back frequently for updates. Tonight you will find me and my stitch ripper in front of the TV in restoration mode.

Happily unstitchingly yours,

Mavis


Thursday, October 15, 2020

Thrifty Thursday and UFO Friday


I delivered this quilt and pillow set to my friend/client today and I can hardly wait to get a picture of it in its forever home.


I kept the scraps from the cutting table with my friend’s permission and have a plan in mind .
I discovered a quilt pattern in my book “Scrap Quilt Sensation” by Katharine Guerrero . https://tinyurl.com/y4mkqyla

The pattern is called Strictly Triangles. I’ve had this book since February 2011 . I was drawn by the vibrant colours. It’s time to actually use my triangle scraps and get this started!


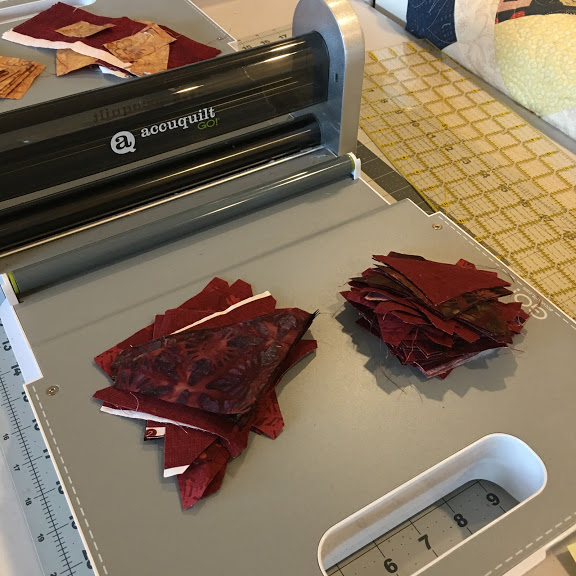
I pulled out my Accuquilt GO cutter and my two sizes of half square triangles . I cut down these scraps into useable triangles to add to the ones I’m collecting in my cupboard for this project. It will be a “Leaders and Enders” quilt which means that while I’m working on a main project, instead of cutting threads at the end of sewing, you insert two pieces that you want to sew together for another project and “sew off” onto them . 

This brilliant idea is from Bonnie Hunter of Quiltville and it explains how she gets so many quilts done with her busy schedule. So I will be also building half square triangle units to be assembled later. Get it? Pure genius right!?


I love scrappy quilts and don’t tend to throw away fabric odds and ends if it is something that I can use in another quilt. My scrap bins are full so the ONLY new project I’m allowing myself as I deal with the last decade’s UFOs is scrap quilts from these bins. This quilt should keep me going for awhile!

I’m also going to pull out my next UFO for personal stitching time (not to be confused with quilting for customers time ðŸ™‚ ) This is my own pattern and this will be the fourth colour version I’ve made. The first was traditional Amish black with four other colours, the second one was greens and purple, the third one was black and gold and this one is pinks and greys.


The pattern is available for purchase in my shop https://dayspringquiltcompany.com/product/amish-block-party-pattern/.

Thanks for stopping by! I’m off to load a customer quilt and today I will also hopefully spend some time cutting down some more scraps from the cutting table for my Strictly Triangles Quilt. What are you working on today?

Mavis

Monday, October 12, 2020

APQS DEMO MACHINE SALE!!


Have you had your eye on an APQS quilting machine? Act now, our Demo Sale starts today, October 12, 2020!

Take advantage of deeply discounted prices on those longarm quilting machines used as display models this summer. Our demo machines are backed by our unbeatable lifetime warranty. Inventory is limited and available on a first-come, first-served basis.


Demo Millie - $4,300 discount

Package includes:

  • Discount: $1,700 cash off
  • Free Quilt Glide - $1,250 value
  • Free Automatic Quilt Advance - $1,350 value
  • Deluxe Table with options of: 10 ft., 12 ft. or 14 ft.
  • Lifetime warranty

Click to learn more about optional accessories listed above.

Total Value: $22,300; Sale Price $18,000


Demo Freddie - $4,400 discount

Package includes:

  • Discount: $1,800 cash off
  • Free Quilt Glide - $1,250 value
  • Free Automatic Quilt Advance - $1,350 value
  • Deluxe Table with options of: 10 ft., 12 ft. or 14 ft.
  • Lifetime warranty

Click to learn more about optional accessories listed above.

Total Value: $21,200; Sale Price $16,800


Demo Lucey - SOLD OUT

  • Discount - $1,400 cash off
  • Standard Table with options of: 10 ft. or 12 ft.
  • Lifetime warranty

Total Value: $13,400; Sale Price $12,000


Demo Lenni - $2,000 discount

  • Discount - $2,000 cash off
  • Standard Table with options of: 10 ft. or 12 ft.
  • Lifetime warranty

Total Value: $11,300; Sale Price $9,300


Demo QuiltPath

  • Discount - $750 cash off
  • 1-year warranty

Total Machine Value: $10,500; Sale Price is $9,750


Demo George

Total Value: $7,200/ Sale Price is $6,600


Don't forget the amazing extras that come with APQS machines:

  • Bobbin Winder
  • FREE Beginner' class ($200 value)
  • Several sample spools of thread
  • A starter pantograph
  • A package of needles
  • Extra bobbins

Only $1,000 for optional Bliss Track System Upgrade - Available on all Deluxe and Standard frames.

Tuesday, October 6, 2020

Polka Dot Party Quilt Pattern history

Here’s a bit of a journey to share on the development of this latest pattern. A few years ago (like more than 10!) we had a quilting group in our then church that made quilts for all the new babies in the congregation . There were years when we had a bumper crop and could hardly keep up. But we did find some time to do some other quilts for other causes as well. One year we sent a bunch of quilts to some volunteers in Romania for their living quarters . They volunteered in an orphanage.

We had wanted to send baby quilts for the orphanage but were told that they don’t cover the babies with blankets . While this was a hard thing to comprehend by our North American standards, we understood and chose to bless their ministry another way.

We also had two ladies at that Church who were the kitchen volunteers and faithfully served us delicious food for ALL the monthly church luncheons and special events . Our quilting group wanted to recognize their faithful service and bless them, so two of us in the group made them these quilts. Mine was called Corn and Beans in Provence . The title seemed appropriate for a cook. This was all the way back in 2008!

Corn and Beans in Provence

It was so named because of the Provencal fabrics. Look familiar? This was the basis of my design for Polka Dot Party. I created the original pattern but never published it. I was asked by one of my local quilt guilds to provide a mystery quilt for them. Rather than reinventing the wheel, I decided that this was a good, simple and quick choice.

I then started play in EQ8 to get the pattern drafted. I wrote the mystery in three steps and the finale was published this past Monday. The ladies in the guild and in another facebook group are busy finishing their quilts. Here’s mine:

I also volunteered to contribute a free quilt pattern to APQS for their October blog post so it all seemed to fall into place.

This pattern is FREE in my store (link on the main page) and will be published by APQS later this month.

We are using the hashtags #polkadotpartymysteryquilt and #polkadotpartyquilt (for those not doing it as a mystery). I am looking forward to seeing all the different quilts.

Thanks for following this rabbit trail (ahem … journey) with me. If you’re a pattern designer, what is your inspiration? Do you get dreams about quilts and draft them from what you envisioned? Do you spot something in nature and use that as a launchpad for your own interpretation? Do you see a bundle of fat quarters and know exactly what you want to do with them? For me this time, I really, really wanted to play with polka dots and remembered my Corn and Beans quilt and married the two together.

Until next time,

Mavis